

WE ENCOURAGE OUR CLIENTS TO CONSULT A SKILLES TILE SETTER FOR THR INSTALLATION
ZELLIGE INSTALLATION TIPS & GUIDANCE

THE PROCESS
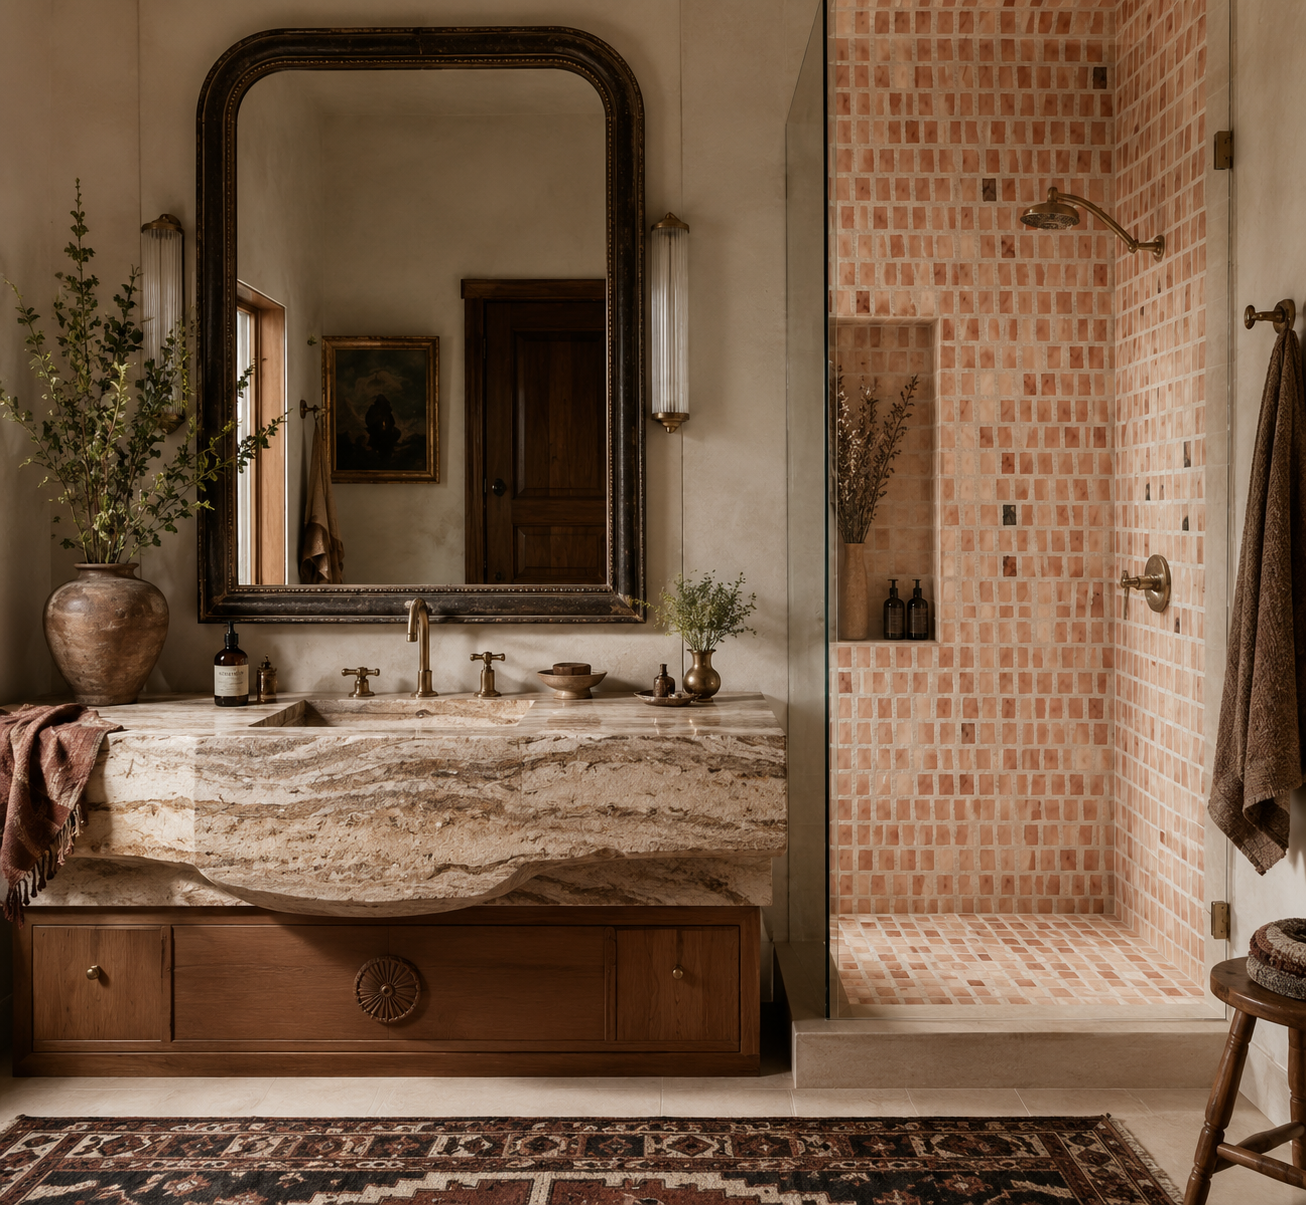
Zellige tiles,with their beautiful handmade character,add a touch of artistry to any space.But due to their handcrafted nature,installation requires a slightly different approach than most standard tiles.
Here's a guide to walk you through the process.
Preparation:
- Surface Prep: Ensure the surface you'll be tiling is clean, free of debris, and completely level. Uneven surfaces will show through the finished product and compromise the installation.
- Mix Up Your Tiles: Zellige tiles have slight variations in size, shape, and color. To achieve a balanced and visually appealing look, pull tiles from several boxes and mix them before laying them out.
INSTALLATION
- Flexible is the Way to Go: Use a high-bond, flexible adhesive specifically designed for mosaics or ceramics. Apply the adhesive to both the back of the tile and the prepared surface.
- Close Quarters: Unlike standard tiles, zellige tiles are typically laid with minimal to no grout space between them. Embrace the natural variations in their edges – small gaps are expected and will be filled later with grout. As you place the tiles, use your hand to level them and maintain a consistent overall plane.
- Cutting Made Easy: Zellige tiles are relatively soft and can be easily cut using a wet saw with a diamond blade. This allows you to make adjustments for corners or create intricate patterns.
Zellige Installation in Commercial and/or Wet Areas
If installing Zellige on a flooring surface in a wet or commercial area, slip resistance can be improved by increasing the grout joint size and/or applying an anti-slip product after installation is complete.
Always consult with your licensed installer regarding slip resistance prior to installation. Note that glazed Zellige has a DCOF rating of 0.16. Refer to the product spec sheet for additional information.
Lay Zellige tiles according to the drying time required for the thin-set you are using. Press each tile firmly into place using the palm of your hand to ensure full contact with the thin-set.
Level the tiles as needed to achieve your desired finish - for a more uniform appearance, level the tiles as you go.

GROUTING
- Filling the Gaps: Once the adhesive has cured completely, apply grout using a soft grout float. Ensure all the spaces between the tiles are fully filled with grout. Opt for a flexible liquid grout suitable for zellige installations.
- Cleaning Up: After waiting 20-30 minutes for the grout to set slightly, remove the excess using a damp sponge or cloth. Follow the grout manufacturer's recommendations for cleaning and finishing touches.

TIPS
- Zellige tiles are delicate due to their handmade nature. Handle them with care throughout the installation process to avoid chipping or breaking.
- Since they don't have bullnose tiles (rounded edge tiles), you can create a finished edge by using a grout color that complements the zellige tiles themselves.
- Zellige tiles come in a vast array of colors and shapes. Unleash your creativity and create one-of-a-kind patterns or designs to personalize your space.
By following these steps and keeping the additional tips in mind, you can successfully install zellige tiles and add a touch of unique beauty to your home. Remember, if you're unsure about any part of the process, consulting with a professional tile installer is always a good option.
These installation instructions are offered as guidelines only. New York Cement Tile will not be held responsible for errors, problems or issues due to installation.
