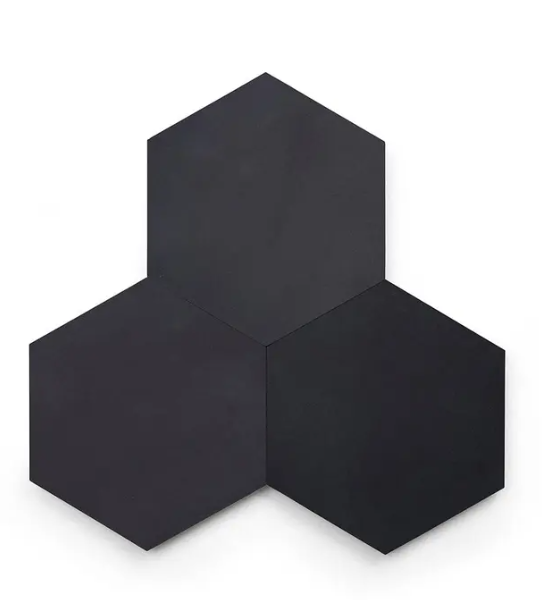

Solid Hex-Black
Solid Hex-Black
Couldn't load pickup availability


Specifications
Size
8X9
Thickness
5/8"
CUSTOM CEMENT
Looking for a one-of-a-kind finish? We specialize in crafting custom cement tile to suit your unique vision. From boutique retail and stylish lobbies to tailored residential spaces, we turn ideas into stunning surfaces.
Let’s bring your project to life — contact us to get started.
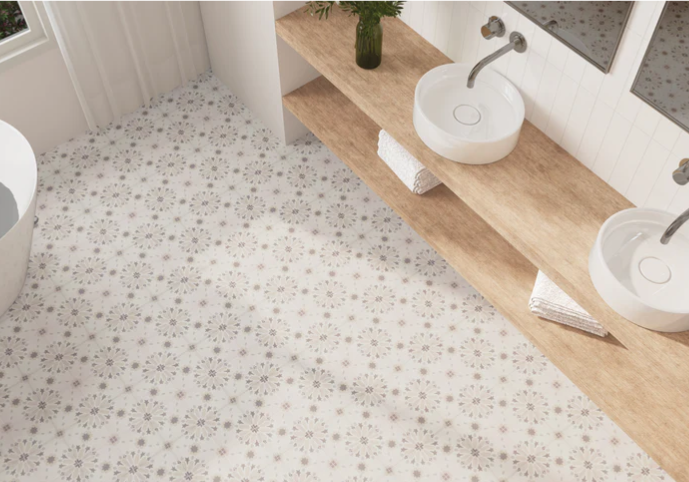
CEMENT TILE CHARM
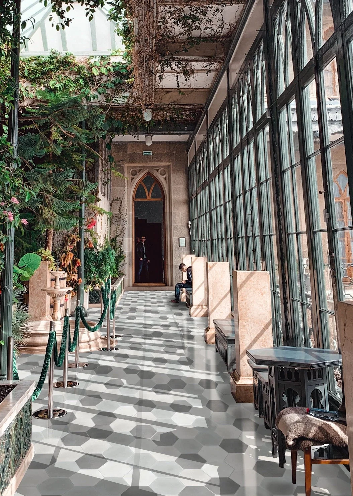
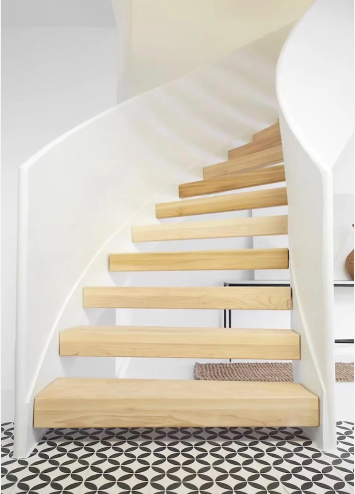
Each piece craft by hand—infusing color, pattern, and tradition into every design. Whether bold or minimal, geometric or organic, our cement tiles bring depth, texture, and soul to floors, walls, and statement surfaces. Durable, timeless, and endlessly customizable, they're made to transform everyday spaces into works of art.
THE BEAUTY OF HANDMADE ZELLIGE
HOW CEMENT TILE IS MADE
Each tile is handcrafted using mineral pigments, fine cement .Pigments are hand-poured into brass molds, layer by layer, then hydraulically pressed to bond the pattern into the tile itself. No firing, no glaze—just dense, color-rich surfaces made to last.
COLLECTION DIMENSIONS
Our Cement tiles are available in the following standard sizes:
- 8" x 8" x ⅝" (200 x 200 x 16 mm)
- 4" x 4" x ¾" (100 x 100 x 18 mm)
- 2" x 8" x ½" (200 x 50 x 12 mm)
- 2" x 12" x ½" (300 x 50 x 16 mm)
- Hexagon – 9" x 8" x ½" (230 x 200 x 12 mm)
- Triangle – 13.4" x 11.8" x ¾" (340 x 300 x 18 mm)
- Fish Scale – 8" x 8" x ½" (200 x 200 x 12 mm)
All dimensions are nominal. As with all handmade cement products, variation in thickness, size, and tone is expected and part of the material’s natural beauty.
Contact us for Custom Options!
GROUT
Proper grouting ensures both the durability and appearance of your CEMENT installation.
Recommended Grout
- Mapei Flexcolor CQ (preferred) or other unsanded cementitious grout
- Grout joint: 1/16" for clean, refined lines
- Use white thin set for most applications
Step-by-Step Grouting
- Prep the Area: Ensure tiles are clean, sealed, and fully cured before starting.
- Test Grout Color: Always test grout on-site under final lighting before proceeding.
- Apply Grout: Using a rubber grout float, work in small sections (2' x 2' max).
- Wipe Excess Immediately: Use a damp sponge to remove grout residue from tile faces right away.
- Avoid Haze: Do not grout the entire area at once. Terrazzo is porous—unsealed areas may stain.
- Cure Time: Allow grout to cure fully (per manufacturer instructions, usually 48 hours).
- Final Seal: Once grout has cured, clean the surface and apply a final coat of sealer to both tiles and grout lines. For interiors, apply a protective wax topcoat if desired.
Grout Color Tips
Avoid dark or high-contrast grout unless using a grout bag and sealing thoroughly before and after. Lighter grout colors generally provide a more timeless and clean look.
TOOLS FOR INSTALLATION
- Sponge
- Bucket
- 1/16” tile spacers
- High-quality medium-bed thin set mortar
- Trowel
- MAPEI Flexcolor CQ grout (neutral color recommended)
- Grout float
- Grout bag (for precise application with contrasting grout)
- Water-cooled tile saw with diamond blade
FOR CLEANING & SEALING
- pH-neutral cleaner (e.g., Miracle Sealants Heavy Duty Cleaner – Acid Substitute)
- Lint-free cotton cloths
- Paint roller, paint tray, sponge
- Water bucket
Interior Sealers:
- 511 Porous Plus Sealer
- Fila Matte Finish Protective Wax
Exterior Sealers:
- 511 Porous Plus Sealer only
INSTALLATION GUIDELINES
For professional use. Please read in full before starting your project.
INSTALLATION RESPONSIBILITY
Clients are responsible for hiring a skilled installer experienced with cement tiles, including proper installation and sealing based on unique site conditions.
TILE CUTTING
water-cooled tile saw.
this can damage the tile and create harmful dust.
FLOOR INSTALLATION
subfloor is fully cured, level, and stable.
high-quality medium-bed thin set mortar.
uncoupling membrane (e.g., Schluter DITRA) to prevent cracking.
WALL INSTALLATION
flat, solid surfaces like cement backer board.
dry interior areas (e.g., kitchen backsplashes), you may install over drywall—but never over paint.
COMMERCIAL & WET AREAS
grout joint size or apply anti-slip treatment to enhance safety.
slip resistance and site-specific performance needs.
SETTING THE TILES
Notched trowel. of each tile before applying mortar.
Avoid using a mallet.
Small 2’x2’ sections.
1/16” spacers (or as preferred for visual effect).
Cure 48 hours before proceeding to grout or sealing.
SEALING BEFORE GROUTING
pH-neutral cleaner and allow them to dry completely.
511 Porous Plus Sealer (or equivalent) in thin, even layers.
Cure for 24–48 hours before grouting.
GROUTING
MAPEI Flexcolor CQ or a comparable grout (neutral tones recommended).
2’x2’ sections—never the full surface at once.
contrasting or dark grout, apply by hand or with a grout bag to maintain clean tile edges.
48 hours.
FINAL SEALING (TOP COAT)
Interior Applications
Fila Matte Finish Protective Wax in very thin layers.
24–48 hours to cure.
Exterior Applications
511 Porous Plus Sealer only (do not apply wax).
paperboard or sheeting.
TRIM & EDGING
We recommend:, or with the tile surface for a clean, trimless look.
Schluter strips or similar.
mitering tiles at 45° for a polished finish.
CARE & MAINTENANCE
Natural Aging
develop patina over time. Subtle wear and hairline marks are expected and part of its artisanal nature.
Routine Cleaning
pH-neutral cleaners.
Recommended Products:
(for regular cleaning)
Resealing
every 1–2 years, depending on traffic and exposure.
CEMENT TILE – FAQs
Cement Tile FAQ
Do I need to seal cement tiles?
Yes. Cement tiles are porous and must be sealed properly before and after grouting. We recommend sealing again after installation and reapplying every 1–2 years depending on use.
Do you offer trim?
We follow a no-trim philosophy for a seamless, modern finish. Use mitered edges, bring drywall flush to the tile, or use Schluter trim strips where needed.
What finish should I expect?
Our cement tiles have a smooth, matte surface with subtle variation in tone, texture, and depth—this is part of their handmade charm.
How do I clean cement tiles?
Use only pH-neutral cleaners. Avoid acidic or abrasive products. Sweep or mop regularly, and wipe spills promptly to avoid staining.
Why order 15% extra?
To account for cuts, blending, breakage, and future repairs. This is industry standard and ensures consistency across your project.